Return shipping labels can be configured with different settings to meet your needs, for Ship with pre-paid label return methods.
Note: ReturnGO enables you to generate return labels and connects you to carriers, but does not operate as the carrier. The carrier is responsible for pickup and delivery. For questions about pickup scheduling, delays, or tracking, contact the carrier directly.
Requirements
Have a return label solution available in your ReturnGO account. The selected connection will be used to generate return labels based on the configurations you make in the steps below.
Note: For the best experience, it’s recommended to use Ship by ReturnGO, which is available by default on all plans and does not require any integration. On most plans, you also have the option to connect a third-party shipping solution if you prefer.
Setting Up the Shipping Label
To set up your shipping label:
- Go to Settings > Return Methods.
- Open the Ship with pre-paid label section.
- Click the pencil icon on the right of the return method to configure it.

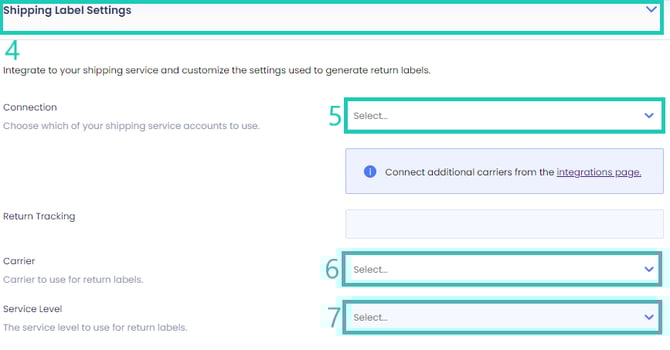
- Open the Shipping Label Settings section.
- Set the Connection to the shipping solution you want to use.
Note: If you are using a third-party shipping, the only options you’ll see in this drop-down are shipping integrations that you’ve already connected in the Integrations page.
6. Select a carrier available in your shipping platform account that can generate return labels, or select auto-select-cheapest to let ReturnGO automatically pick the cheapest carrier for this label. Note that to offer QR codes, you must select a carrier that supports QR codes.
7. Select the service level or select auto-select-cheapest to let ReturnGO automatically pick the cheapest service level for this label.
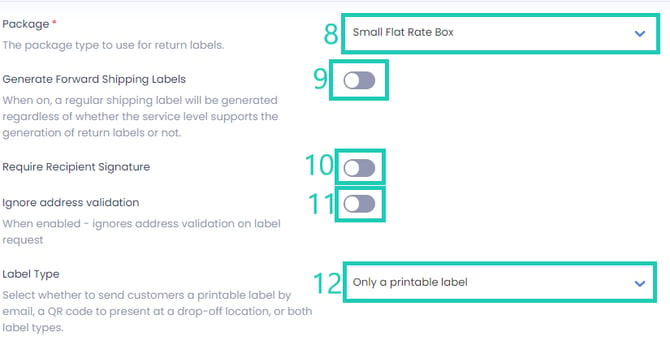
8. Select a package type to use the pre-defined package dimensions supported by the carrier. This field only appears if the service carrier you choose has preset package dimensions. The package type is ignored if you set custom package dimensions.
9. Enable Generate Forward Shipping Labels toggle to generate the return label as a regular shipping label (this is relevant if you’re using a carrier or level that doesn’t offer dedicated return labels).
10. Enable Require Recipient Signature toggle to require the receiver’s signature when the package is returned.
11. Enable Ignore address validation toggle to skip address validation during label request.
12. Select a label type to send to your customers:
- Only a printable label
- Only a QR code
- QR code and/or printable label
Note: To offer QR codes, make sure the carrier and service level you’ve selected support QR codes.
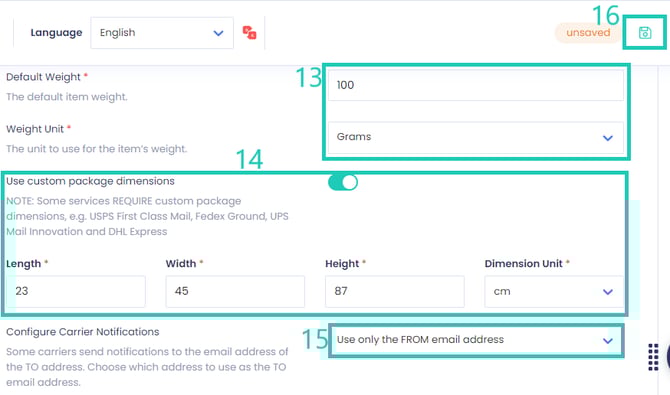
13. Set the weight that will be used as a substitute for the item weight if the item has an invalid or undefined weight in your shop admin product details.
14. Enable Use custom package dimensions toggle to set a custom length, width, and height for your packages. Some services require custom package dimensions, such as USPS First Class Mail, FedEx Ground, and UPS Mail Innovation.
15. Select which email address the carrier should send notifications about the shipment status to.
16. Click on the save icon to save your changes.
Note: To customize the size of the return label file, please contact ReturnGO support.
Customizing the Shipping Label Fee Text
You can edit what the return label fee is called in the return portal.
To customize the fee text that appears in the portal:
- Go to Settings > Portal > Content.
- Click TRANSLATE.

- Select the language you want to customize.
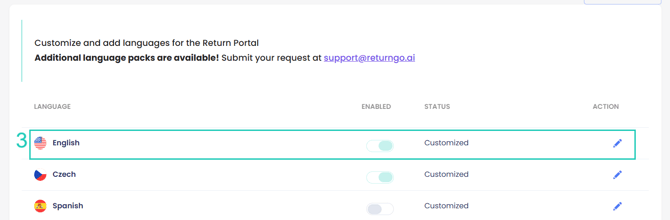
- Open the Return Portal section.
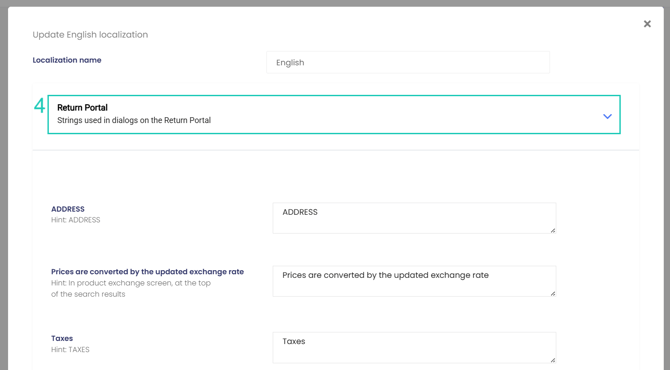
- Search for Return Label Fee.
- Edit the content.

- Click SAVE to save your changes.

Note: ReturnGO includes the Order ID and RMA ID when sending data to the connected shipping provider to generate return labels. However, whether this information appears on the final shipping label depends on the carrier.
Label Type Behavior
When you choose auto-select-cheapest in the service level, the system automatically selects the most affordable shipping option, overriding any other preferences you've set.
Your connected shipping provider generates shipping labels, and the label format, such as a printable label or a QR code, depends on what the selected carrier and service level support.
Example:
If auto-select-cheapest is enabled and the cheapest shipping option uses QR codes, you'll receive a QR code label even if you previously specified a different label type preference. The cost-saving setting takes priority over label format preferences.