User Roles
Last Updated: February 4, 2026
ReturnGO provides different user roles to manage your returns efficiently. Each role has specific permissions and access levels within the application.
Understanding these roles will help you effectively manage your returns and ensure that users have appropriate access based on their responsibilities.
Types of Users
User roles and permissions in ReturnGO fall into the following categories:
OwnerThe Owner role has the highest level of access and control over the application.
Owner users have the following permissions:
- Full access to all pages and functionalities within the app.
- Ability to add and manage users, including assigning user roles.
- Manager approval
Every store has an Owner user by default.
AdminThe Admin role is designed for users who require extensive access to manage returns but with some restrictions.
Admin users have the following permissions:
- Access to all pages and functionalities, except the Analytics > Orders page.
- Ability to add and manage users, including assigning user roles.
- Manager approval
The Online Staff role is intended for users who handle day-to-day return operations for online returns without requiring access to sensitive financial information.
Online Staff users have the following permissions:
- Access to all screens and functionalities, except the Analytics > Orders page.
- No access to the Settings menu or any of its pages.
- No access to the Store Account, Subscription Plans, and Billing History pages.
- No manager approval
Online Store Manager
The Online Store Manager role is for users who oversee online return operations.
They have all the permissions of Online Store Staff plus the ability to approve RMAs requiring manager approval.
Physical Store Staff
The Physical Store Staff role is for in-store employees who handle Buy Online, Return In-Store (BORIS) returns.
This functionality is currently in beta and not yet fully available to all merchants. Apply to join the beta.
Physical Store Staff users have the following permissions:
- Access to the Manage Returns, My Profile, Knowledge Base, and What's New pages.
- No access to analytics or settings.
- No access to Restock and Refund functions.
- No access to the Store Account, Subscription Plans, and Billing History pages.
- No manager approval
When Physical Store Staff users log into their account, they will be prompted to select the specific store and store location where they are working, and select whether to save the selection for the next login.
- The available stores are based on associated ReturnGO stores.
- Store locations are based on your store settings on your eCommerce platform.
Note: Users with access to only one store will see only the store location selection, and not the store selection.

The Physical Store Manager role is for users who oversee in-store return operations. They have all the permissions of Physical Store Staff plus the ability to approve RMAs requiring manager approval.
Adding a New User
Only Owner and Admin users have the ability to add new users.
To add a new user:
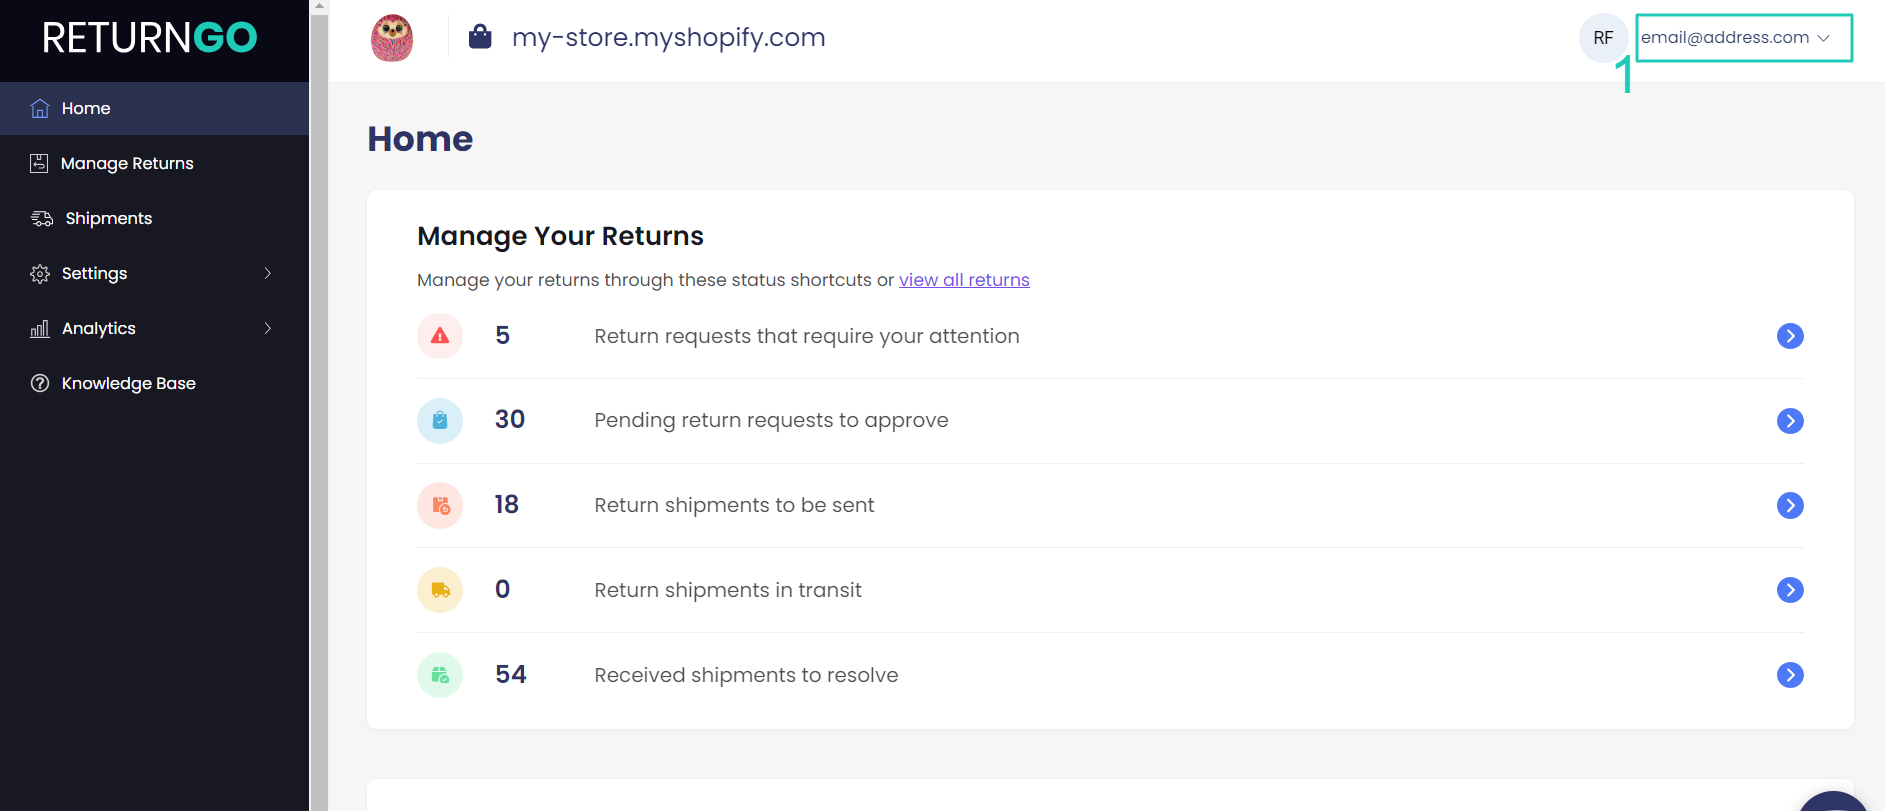
- Click on the email address in the top right corner of the dashboard.
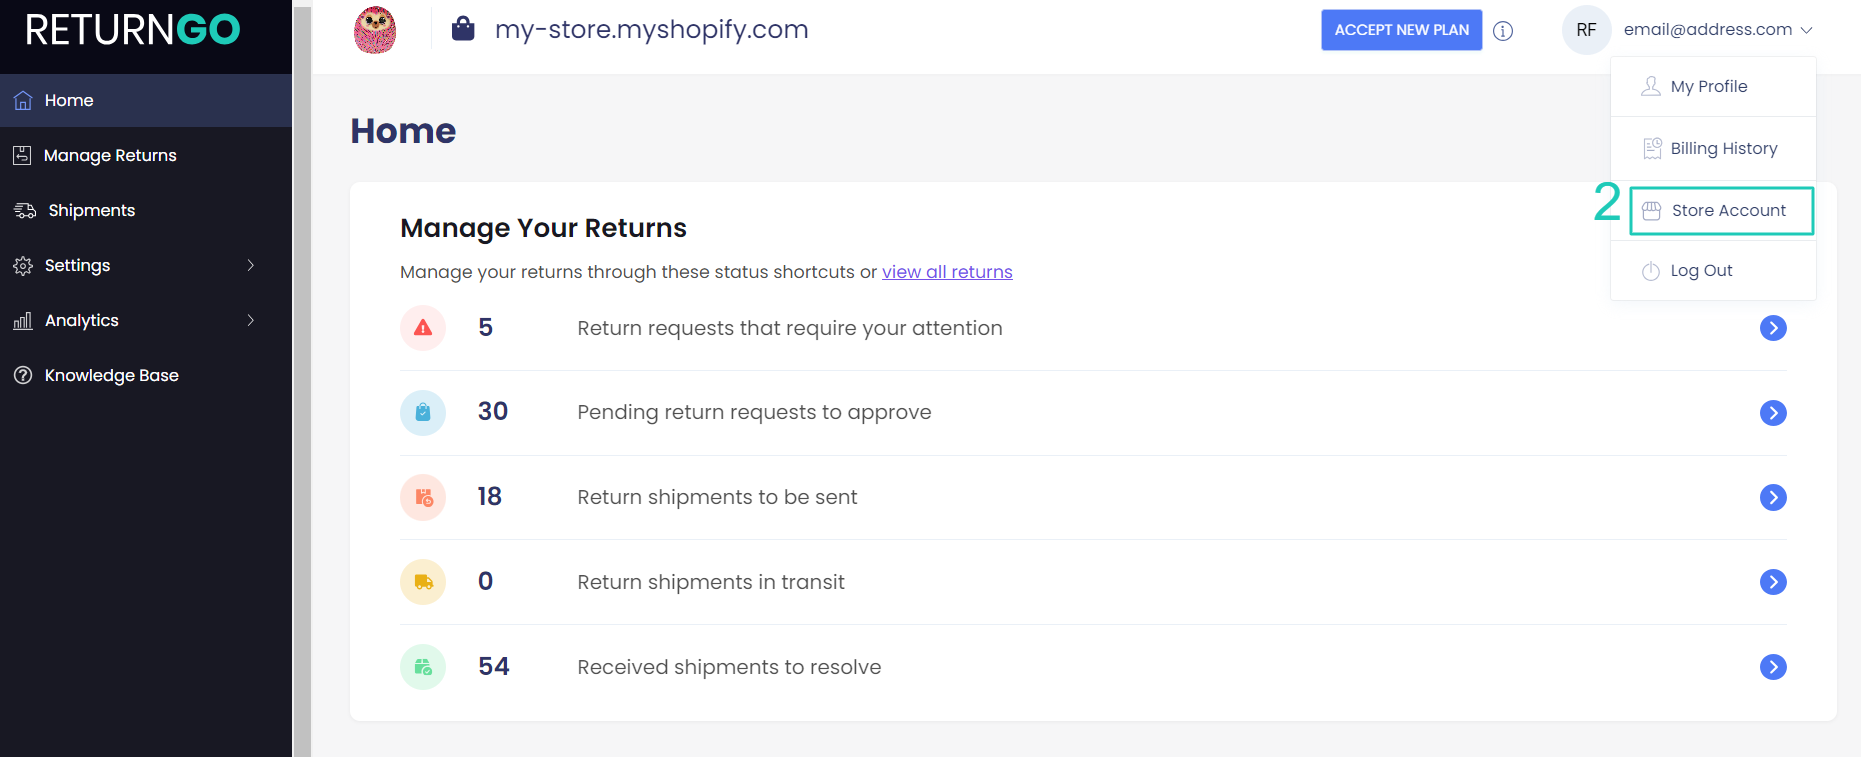
- Click on STORE ACCOUNT in the drop-down account menu.
- Click ADD USER.

- Fill in the required user information, such as name and email address.

- Select the Role for the user.

- Select the RMA Creation Permissions setting to be applied for this user.
- Click on the save icon to save the changes and send them an email invitation.

Your plan includes a certain number of users, and you can purchase additional users as an add-on.

How To Bulk Upload Users
To efficiently add multiple users to ReturnGO at once, you can bulk upload users.
To bulk upload users:
- Prepare a spreadsheet with the following information for the users you want to add:
- First Name
- Last Name
- Shop URL (if you have multiple stores)
- Role
- Create RMA Operation Mode
- Send the spreadsheet to ReturnGO support.
- The ReturnGO team will add all the users to your store.
Here’s a spreadsheet template to get you started.
Modifying User Roles
Owners and Admins can modify user roles when a user's responsibilities change or their access needs to be adjusted.
To modify a user’s permissions:
- Click on the email address in the top right corner of the dashboard
- Within the drop-down account menu, click on STORE ACCOUNT.
- Click on the pencil icon next to the user you want to change permissions for.

- Choose the appropriate permissions for the user.
- Click on the save icon to save the changes.

To configure permissions for internally creating RMAs per user:
1. Click on the email address in the top right corner of the dashboard
2. Within the drop-down account menu, click on STORE ACCOUNT.
3. Click on the pencil icon next to the user you want to edit.

4. In the User Permissions section, select the RMA Creation Permissions setting to be applied for this user:
- No Access - The user will not see the "Create RMA" button option in the dashboard at all.
- Configurable - The user will be able to select for themselves whether to create RMAs in Unlimited mode or in Enforced Policy Eligibility mode.
- Enforced Policy Eligibility - The user will only be able to create RMAs in Enforced Policy Eligibility mode.
5. Click on the save icon to save your changes.

Removing User Access
If a user no longer needs access to ReturnGO, Owners and Admins can revoke their access.
To remove a user's access:
- Click on the email address in the top right corner of the dashboard.

2. Within the drop-down account menu, click on STORE ACCOUNT.
3. Click on the red icon next to the user whose account you want to disable.

User roles and permission levels are essential for maintaining security and controlling data access within ReturnGO. Make sure to regularly review and update your users and their permissions as needed to align with your business's requirements.
Changing User Passwords
Any user can change their password at any time.
Owner and Admin users can change passwords for other users in the store.
Contact support to enable this ability.
To change a password:
1. Click on your email address in the top right corner of the dashboard.
2. Click STORE ACCOUNT.
3. Click on the pencil icon next to the user you want to edit.

4. Under the Password section, click on the CHANGE button.

5. Input the new password.
6. Click SAVE.

Managing Multiple Stores with One Email
You can use the same email address across multiple ReturnGO stores by adding a user with the same email for each store. This enables you to easily switch between stores on the dashboard using the store switcher dropdown on the left side menu, without needing to log out and log back in for each one.
While you can access multiple stores with the same login, the stores will not be connected in terms of settings, analytics, or billing unless you have multiple stores under one plan.
