A policy rule is a combination of a resolution and a return method. You can modify policy rules by adding eligibility conditions and operational settings such as fees and automations.
Creating or Configuring a Policy Rule
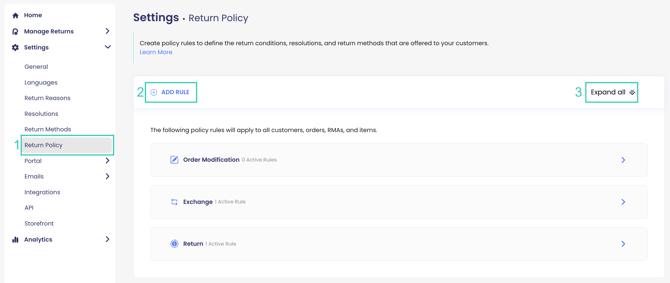
To set up and manage policy rules:
- Go to Settings > Return Policy.
- Click ADD RULE to create a new policy rule.
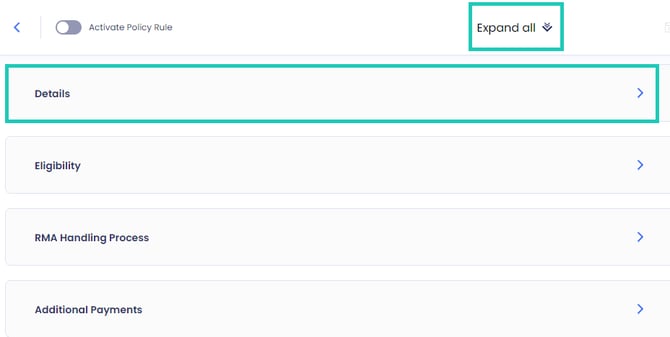
- Alternatively, click EXPAND ALL to configure an existing policy rule.
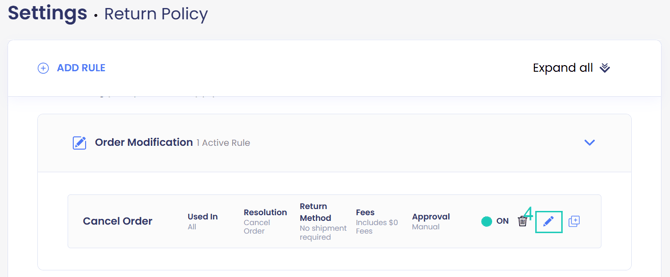
4. Click the pencil icon on the right of the policy rule or click the duplicate icon to create a copy of an existing rule and modify it.
Tip: To prevent issues and track changes, duplicate the rule instead of editing it directly. Disable the old rule until you're sure the new setup works, then delete it.
-
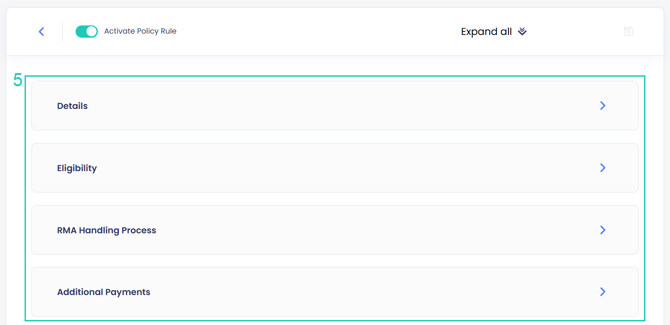
- Policy Rule Details
- Policy Rule Eligibility
- RMA Handling Process
- Additional Payments
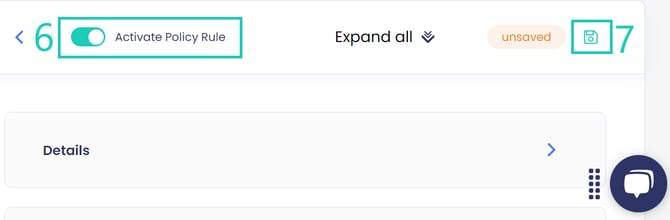
7. Click on the save icon to save your changes.
Completing the Policy Rule Details
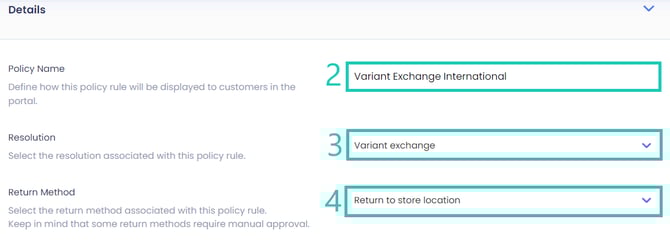
The policy rule details contain the identity, resolution, and return method for the policy rule.
- Click EXPAND ALL or DETAILS to edit the Details section.
-
- Variant Exchange (US)
- Variant Exchange (international)
- Refund (item is damaged)
- Refund (changed my mind)
- Refund (all other reasons)
3. Select the resolution that applies to this policy from the drop-down as defined in Resolutions.
4. Select the return method that applies to this policy from the drop-down as defined in Return Methods.
5. Toggle Require Customers to Validate Address to require customers to provide their shipping address in the portal, before the RMA is created.
Note: Address validation is currently only supported on Shopify and is not supported on custom platforms.
6. Click EDIT ADDRESS.
Note: The address is saved as a new shipping address in the customer's account on your eCommerce store platform, and will be used as the From address when creating the return label. It will also appear on the RMA page in the ReturnGO dashboard.
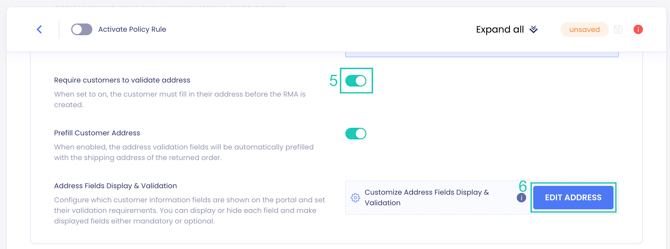
Note: The Address Fields Display & Validation setting is currently available only in the Edge portal.
7. Configure which customer information fields are shown on the portal and set their validation requirements. You can display or hide each field and make displayed fields either mandatory or optional.
8. Click APPLY.

Note: This option is only available if you require customers to validate their address.
Setting up the Policy Rule Eligibility
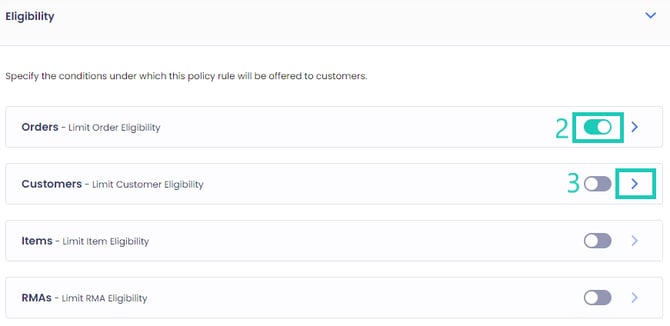
The Eligibility section lets you specify which customers, orders, and situations are eligible for this policy rule. You can enable one or more at a time.
- Open the Eligibility section.

- Toggle the relevant eligibility condition type to enable it.
- Open the relevant eligibility condition type to configure it.
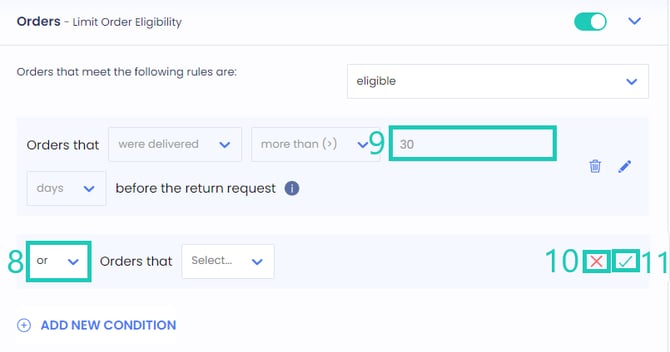
- Select if this condition will give or remove eligibility for this policy rule.
- Click ADD NEW CONDITION.
- Click the trash icon to delete an existing condition. to add a new eligibility condition.
- Click the pencil icon to the right of the condition to configure.
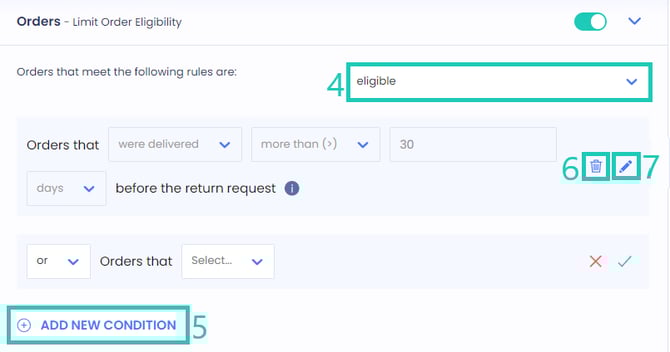
- Select an option applicable to the condition from the drop-downs.
- Fill in the required field/s with appropriate information to complete the condition.
Learn more about the Return Eligibility Conditions. - Click the check mark to save the changes.
- Alternatively, click the x icon to discard the changes.
Note: When setting eligibility conditions, use positive logic (e.g., “eligible if X is Y”) rather than negative logic (e.g., “not eligible if X is not Y”). This helps prevent issues with rule logic and makes configurations more reliable.
Configuring the RMA Handling Process
Automation and reservation of items are configured in RMA Handling Process section. Follow the steps below:
- Open the RMA Handling Process section.
- Set Approval Process to MANUAL for manual approval and AUTOMATIC for auto-approval.
- Set Exchange Process to MANUAL to manually process exchanges and AUTOMATIC for auto-exchange.
- Set Refund Process to MANUAL to manually process refunds and AUTOMATIC for auto-refund.
- Set Mark as Done to MANUAL to manually set the request as Done and AUTOMATIC for auto-mark as done.

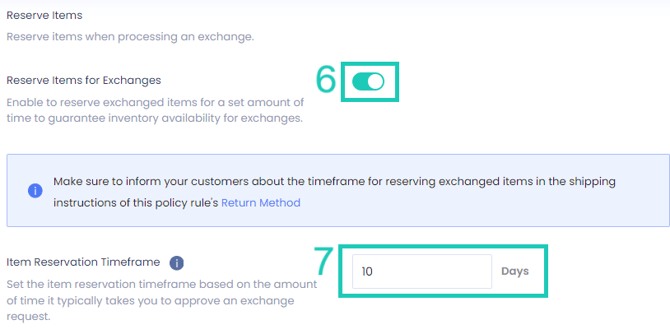
6. Toggle Reserve Items for Exchanges to enable item reservation for this policy rule.
7. Set a specific item reservation timeframe for this policy rule. Refer to Reserve Items for more info and configuration.
Setting up Additional Payments
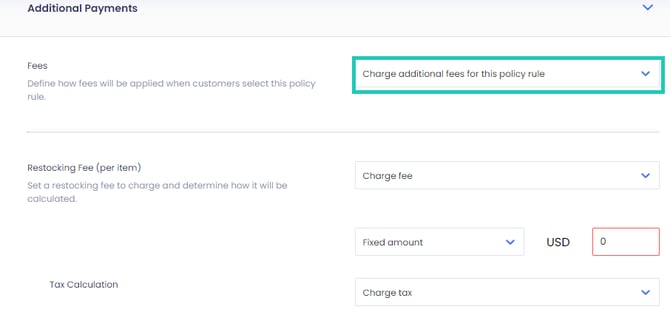
You can define additional fees for exchanges and returns in the Additional Payments section.
- Open the Additional Payments section.
- Select CHARGE ADDITIONAL FEES FOR THIS POLICY RULE from the Fees drop-down to configure which fees to charge, which fee to add tax to, and how to calculate the tax as defined in the return fees guide.
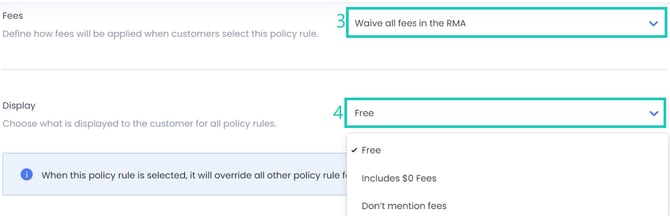
3. Select DO NOT CHARGE ADDITIONAL FEES FOR THIS POLICY RULE or WAIVE ALL FEES IN THE RMA if no additional payments are needed for this policy rule.
4. Select an option from the Display drop-down to choose how your website displays the free-of-charge indication.
Updating an Existing Policy Rule
When you update a policy rule that has open RMAs, a pop-up appears to confirm your changes are intended and clarify how existing RMAs will behave. This improves transparency around refund automation changes without altering existing policies automatically.
A pop-up is also shown if:
- The new return method uses a shipping integration that does not support any return fees, such as a label fee.
- The new return method uses a shipping integration that does not provide tracking information while instant exchange is enabled.
- The policy rule contains outdated configuration settings, for example, a cancellation fee is applied when the selected return resolution is not cancel order.
If you need help with configuring your policy rules, please contact ReturnGO support for assistance.
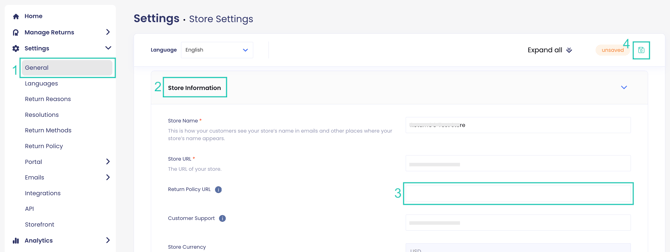
Setting Up Your Return Policy URL
You can add your store’s return policy URL. Customers who attempt to return ineligible items will be referred to your return policy for clarification.
- Go to Settings > General.
- Open the Store Information section.
- Add your Return Policy URL.
- Click on the save icon to save your changes.
Aligning Policy Rules
When setting up your ReturnGO policy rules, consider how different rules might interact. Alignment between your policy rules is key to ensuring a smooth return experience and achieving your desired outcomes.
Multiple policy rules can apply to a single return request, and their conditions might overlap. Without proper alignment, these overlaps could lead to unintended consequences. When creating new rules, make sure they do not contradict existing ones or create loopholes in your policy.